
I started by painting a 4 x 4 inch cradled wood panel with gesso, acrylic paint, and acrylic wash. I included metallic paint to bring a subtle sheen to the surface.

Next I gathered some large scraps of hand painted water color paper from my stash that I always have on hand for projects.

I selected one scrap that called to me embossed the surface using a clear stamp with a random and grungy design, a watermark embossing stamp pad, silver embossing powder and a heat gun.

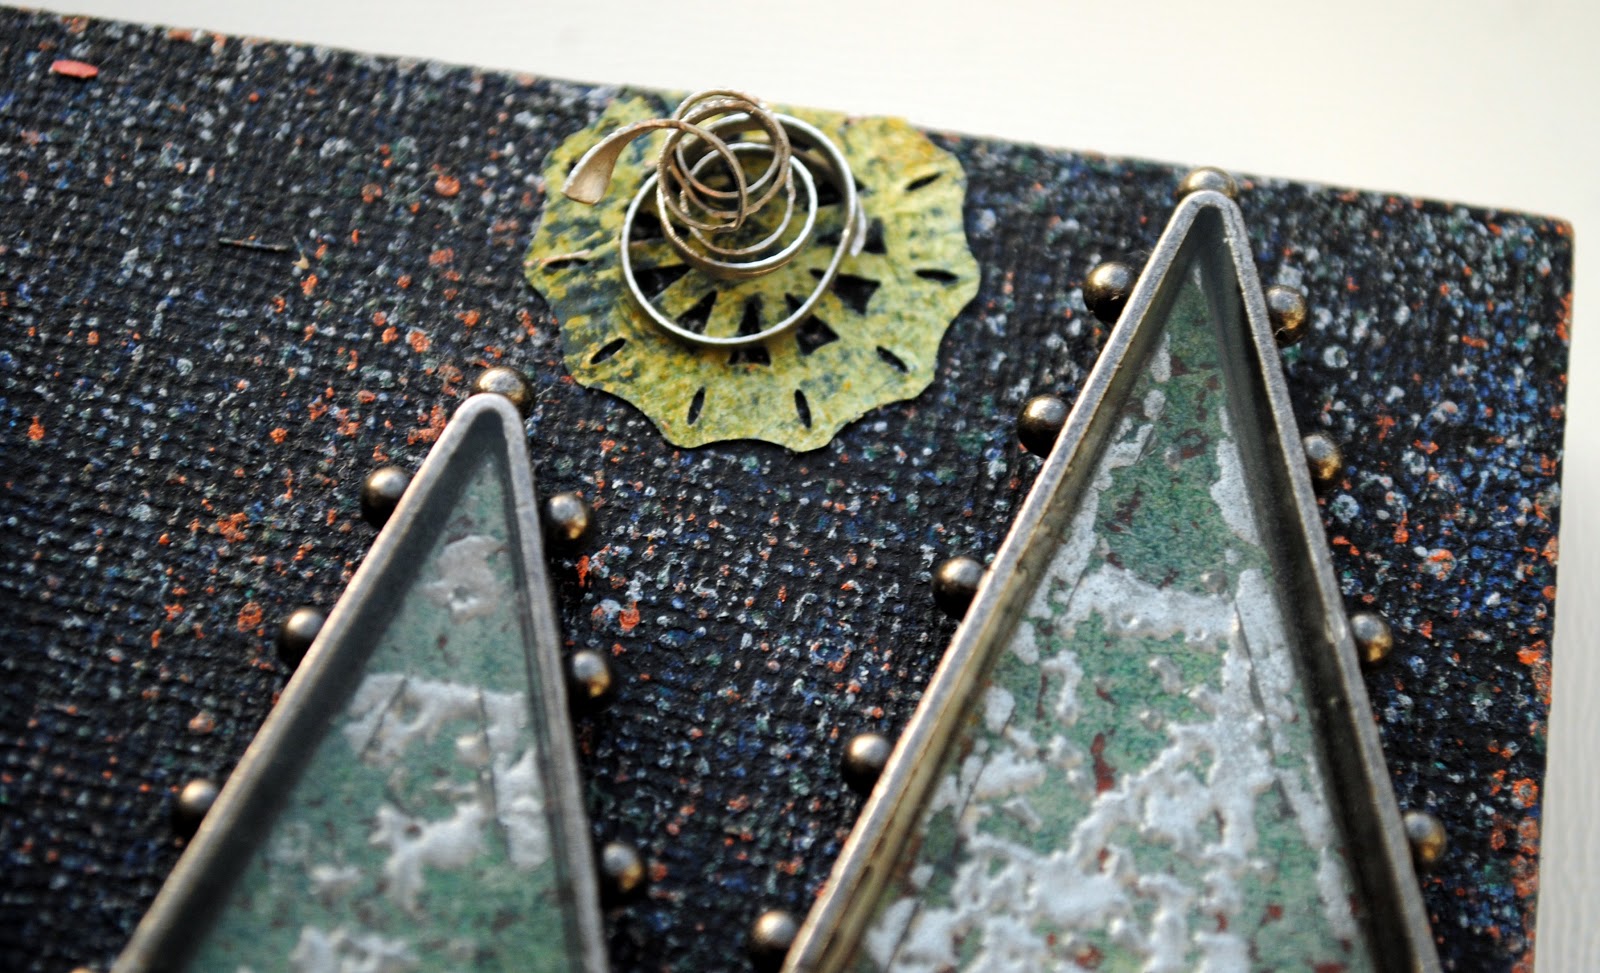
Rummaging through my supply of bezels from Spellbinders new Media MixageTM line, I selected three of the medium triangle bezels with hobnails around the edge.

Using the matching die, I cut my scrap of embossed and painted paper to fit perfectly within the bezel.


I filled each bezel with Ice Resin, following the easy instructions on the package. I left these pieces aside for most of the day as it takes from 6-12 hours to fully dry. As the final detail, I glued small, metallic beads - a different color for each bezel - to the attached rings at the base of each triangle.
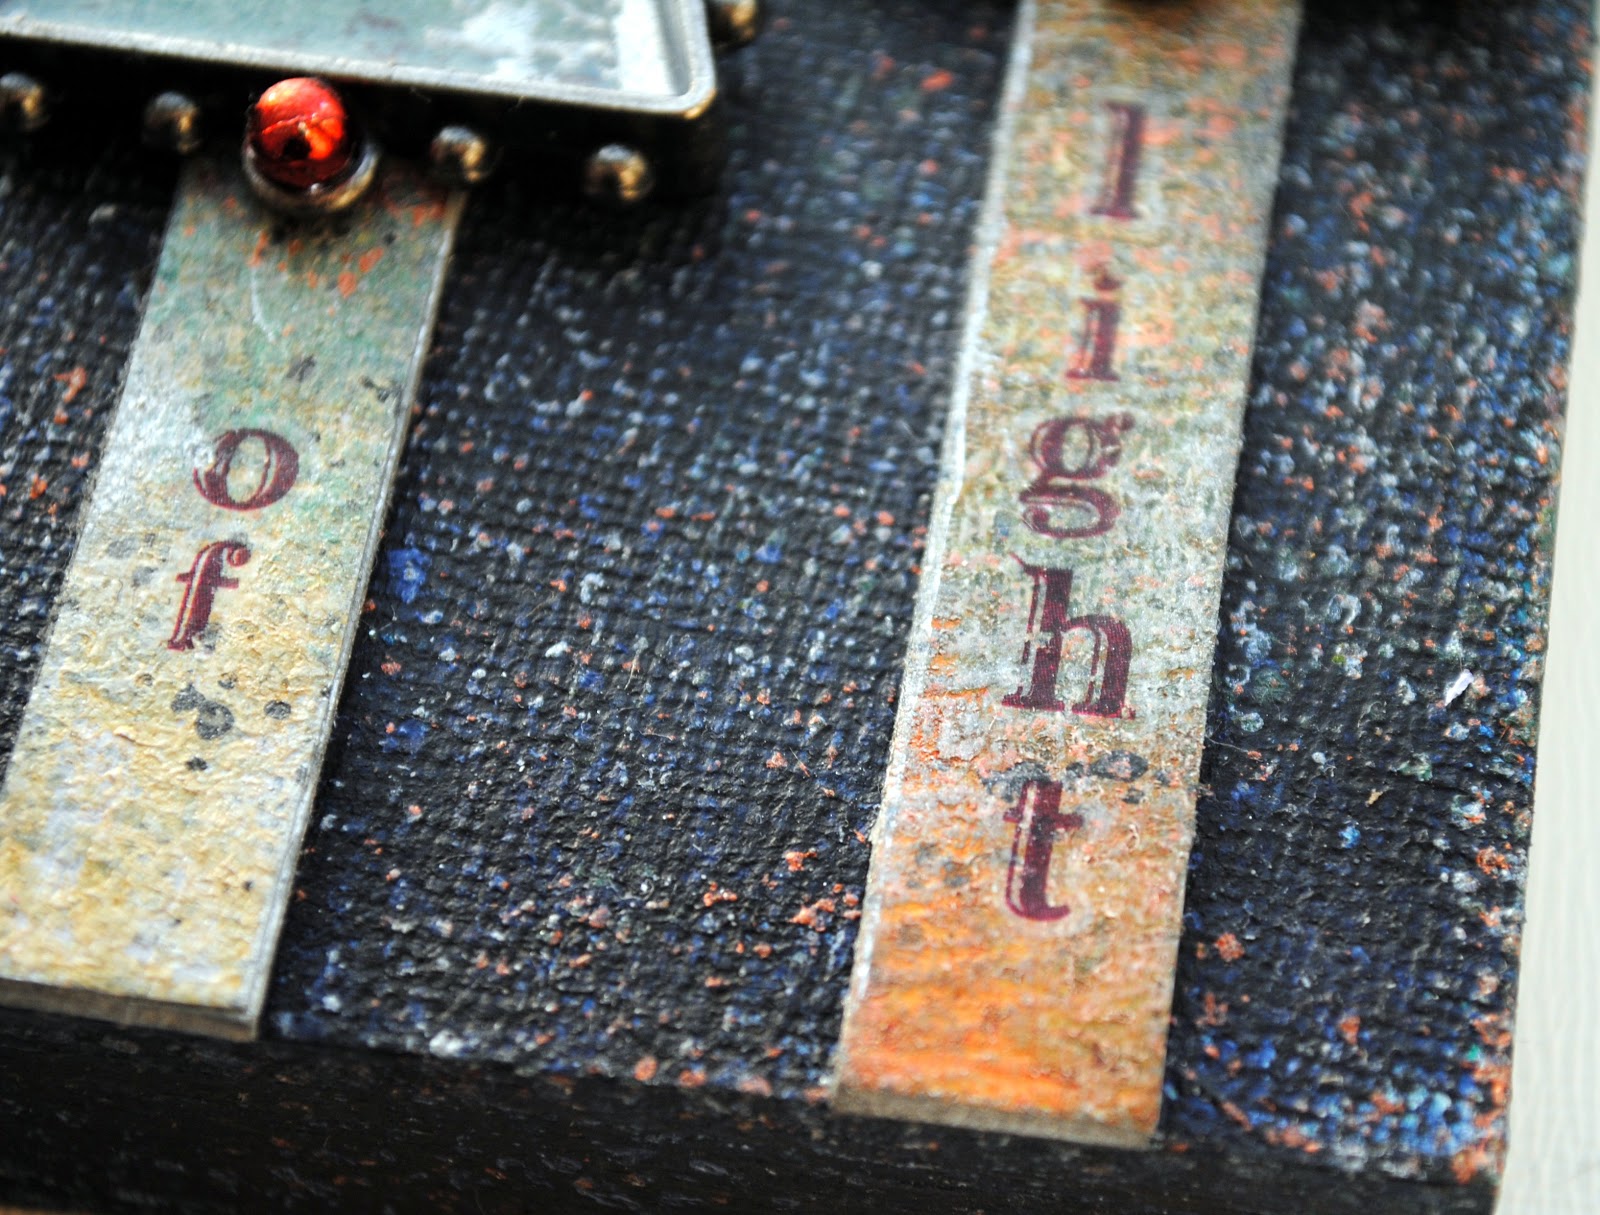
Next I hand cut strips of assorted painted paper and glued them onto book board which I cut to a matching size. To finish off these strips, I edged the book board with both a silver leafing pen and dye ink from a stamp pad.

To complete these pieces, I used rub on letters to write my text -- trees of light.

I wanted to add more design to the surface of the panel and used a die from Spellbinders Exquisite Circles to cut a shape from scraps of painted paper. I inserted a small piece of wax paper between the die and the painted paper when cutting so I could more easily release the intricate shape from the die.

For one more detail and added dimension, I twisted thin strips of metal into spiral shapes to add to the die cuts.
All of these individual pieces came together to form Trees of Light...


---------------------------------
Supply List
Spellbinders Paper Art Supplies:
S4-384 SpellbindersTM Nestabilities® Exquisite Circles
Preferred Promotional Partners: Tsukineko Momento dye ink pad, Imagine Crafts Inkblushers sponge
Cross Promotional Partners: Ice Resin®
Other: cradled wood panel, watercolor paper, book board, gesso, acrylic paint, paint brush, leafing pen, altered metal, beads, rub on letters, adhesive, scissors


21 comments:
Oh my gosh ..what an fabulous inspirational post !
I just bought Ice Resin in my local store...
jet I always took some layers of clear varnish to achieve a glossy and archivial look over some items..but I think this resin-art is another dimension for us!
WOW--looks wonderful your creation!
xxx from Austria
Susi
love the background the best.
Seth - the whole piece is terrific.
that is absolutely wonderful Seth! the detailing in your work is like no other ... :) and thanks for sharing your process :)
looks like you are having some fun with your new Spellbinders toys...love all the textural layers...and appreciate reading about your process...
lovely project, thanks for the detailed photos - otherwise I wouldn´t have recognized the delicate colours of the stems!
It's great to see your creative process and how the final piece comes together. I love so much about this, the texture, the metal spirals . . . . the trees. I'm trying to explain my own creations more, like the Self Portrait I posted yesterday. Thanks for constantly being an inspiration.
Very cool Seth. Your artwork and step-outs always look so neat and tidy. Is your studio tidy? Are you a tidy worker? I try to be tidy, but once the creative flow starts... well... tidy is not a word I would use to describe anything along my path. Thanks for sharing all the details for this project!
Oh I love this. I saw all the bezels and dies in my craft store the other day. I didn't know what they are all about until now. Thanks for the inspiration!
great piece & tutorial - very easy to follow with good pics
Too beautiful. Love it.
Lovely outcome. I like the feel- look that I am seeing trees in a forest at night!
This is just great, Seth. Thanks so much! :)
Seth, this is so beautiful! I really enjoy listening to your step by step on this. The color and shimmer is something I really love.
Great project, Seth! I just love all the textures and details. Thank you for sharing the process!
Cheers,
Gaby xo
So cool! Time for me to find a part-time job so I can afford to do this stuff. :)
Seth - this is a really neat piece of art. Really shows how you can take some commercial pieces, die cuts and make something so original. Wonderful work.
Thanks for showing the process Seth. It's always interesting to see how other artists proceed towards a finished piece.
Thanks for showing this, Seth. These came out so cool.
Love the step by step sharing here Seth! This work is lovely =-)
These are so gorgeous! I love the colors and the theme. I have Ice Resin just waiting to be used, and now i"m inspired to break it out and make something!
Hi Seth, fabulous project! Aren't Susan Lenart Kazmer's signature hobnail bezels just the best? Susan's Media Mixage line with Spellbinders is just amazing. Of course, ICE makes everything nice. (grin) Love it and love your tutorial! Have a creative weekend. -- Jen
Post a Comment