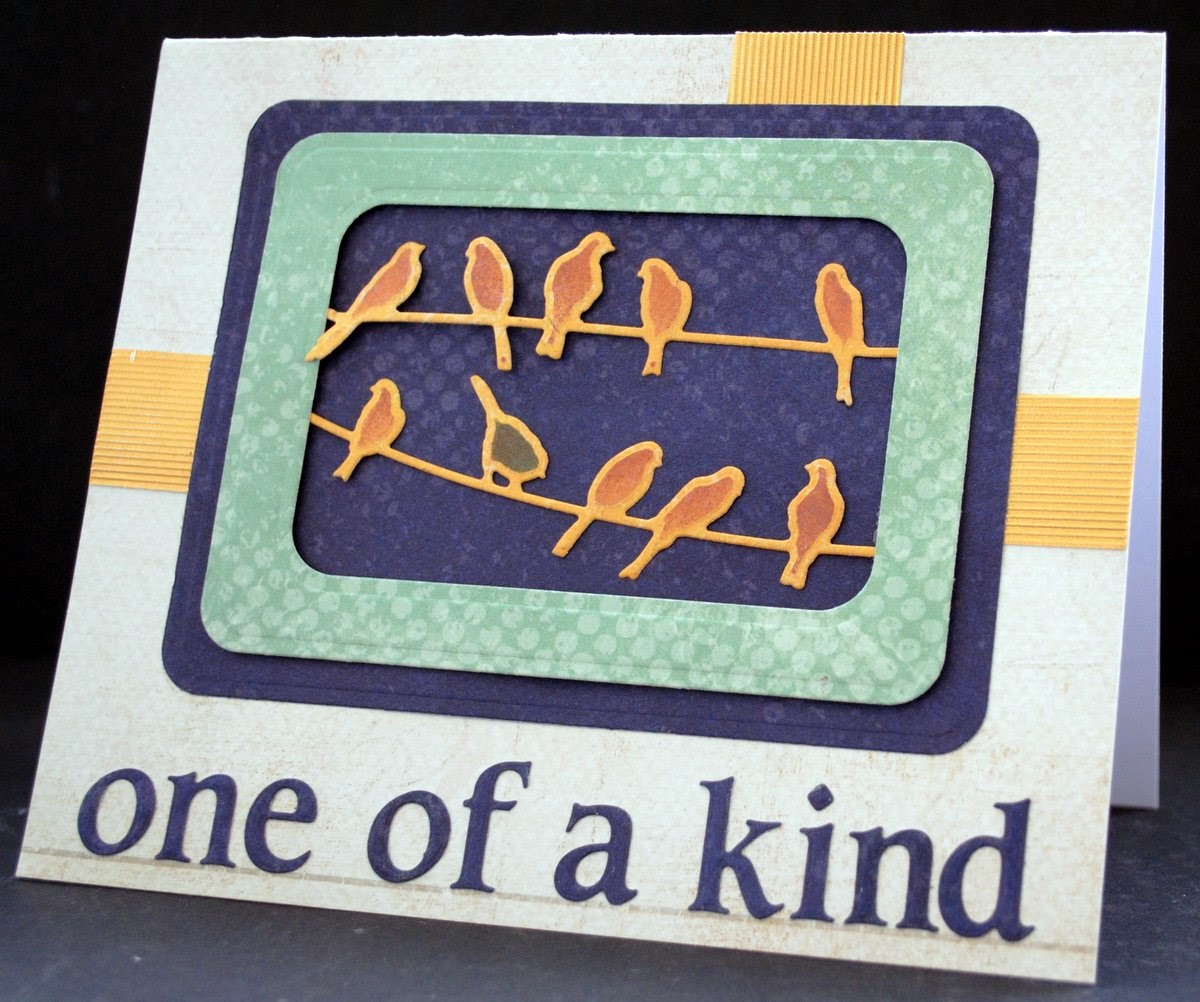
I am happy to report that I am a guest blogger on the Spellbinders blog today. To make it even better, I will be giving away the project I have created for this tutorial. And to make it even better than that, Spellbinders is hosting a giveaway (details are at the end of this post) of some of the products I used to create my card.
Card? Yes...card. I have never made a traditional card (shared with the public at least) before but thought that today was the perfect time. As a blogger for Spellbinders, one of my goals is to introduce mixed media techniques to all the card makers and scrapbookers who use their products. Figured I should walk the walk, step inside their shoes, and make a card. Who knows -- maybe I will scrapbook next. I believe creative people come in all forms and that there is every reason for us to cross over to "the other side" -- whichever that may be.
This card was inspired by Spellbinders new Birds on a Wire die. I die cut and embossed some decorative paper to start the project. Leaving the cut paper in the die, I used the die as a stencil and inked the birds as well. You will note that one bird is in a different shade.
I selected Spellbinders A2 Curved Matting Basics B die set to create a window, using dies #4 and #6 and decorative paper.
Turning the window over, I taped the birds to the reverse side...
...so, when turned back over, they would be strung through the window on the front.
I next used the largest die in the same set to cut and emboss a different color paper to use as a base for the window.
Using adhesive pop dots to create dimension, I then adhered the window to the base.
You can better see the layers from this angle.
I then used Spellbinders Scratch Lines Texture Plate to create additional embellishment for the card. This plate deeply embossed a piece of foil so that I can add a bit of texture as well. I cut this strip into 3 pieces to place in different areas on the card.
Using Spellbinders Font One - Lowercase die set, I cut a phrase that was inspired by the birds out of decorative paper.
With all my components ready, I used a piece of decorative paper to make the card itself. I chose to cut it to a size of approximately 6 ½" x 5 ½" when folded based on the measurements of all the pieces that I had made.
Finally the time had come to put together all the individual parts and create my first card.
------------------------
Supply List
Spellbinders Paper Art Supplies:
Preferred Promotional Partners: Tsukineko® Dew Drop Brilliance Pigment Ink Pad, Tsukineko® Dew Drop Momento Die Ink Pad, Imagine Crafts® Inkblushers Sponge
Other: scissor, adhesive, pop dots, tape
--------------------------
Giveaways
To be entered into the giveaway sponsored by Spellbinders and be eligible to win many of the products I used to create my card, head over to the Spellbinders blog and follow instructions there.
For a chance to win this "one of a kind" card, please leave a comment on this blog post and make sure I have your email address. Comments will close end of day Wednesday 4/2 and the winner will be contacted by email.
This giveaway is now closed. Congratulations to Lynn Hardy who is the lucky winner!
This giveaway is now closed. Congratulations to Lynn Hardy who is the lucky winner!


