Today, while attempting an idea that was an epic fail, I ended up creating Baked Texture skins. So simple and so cool. Just follow the recipe below.

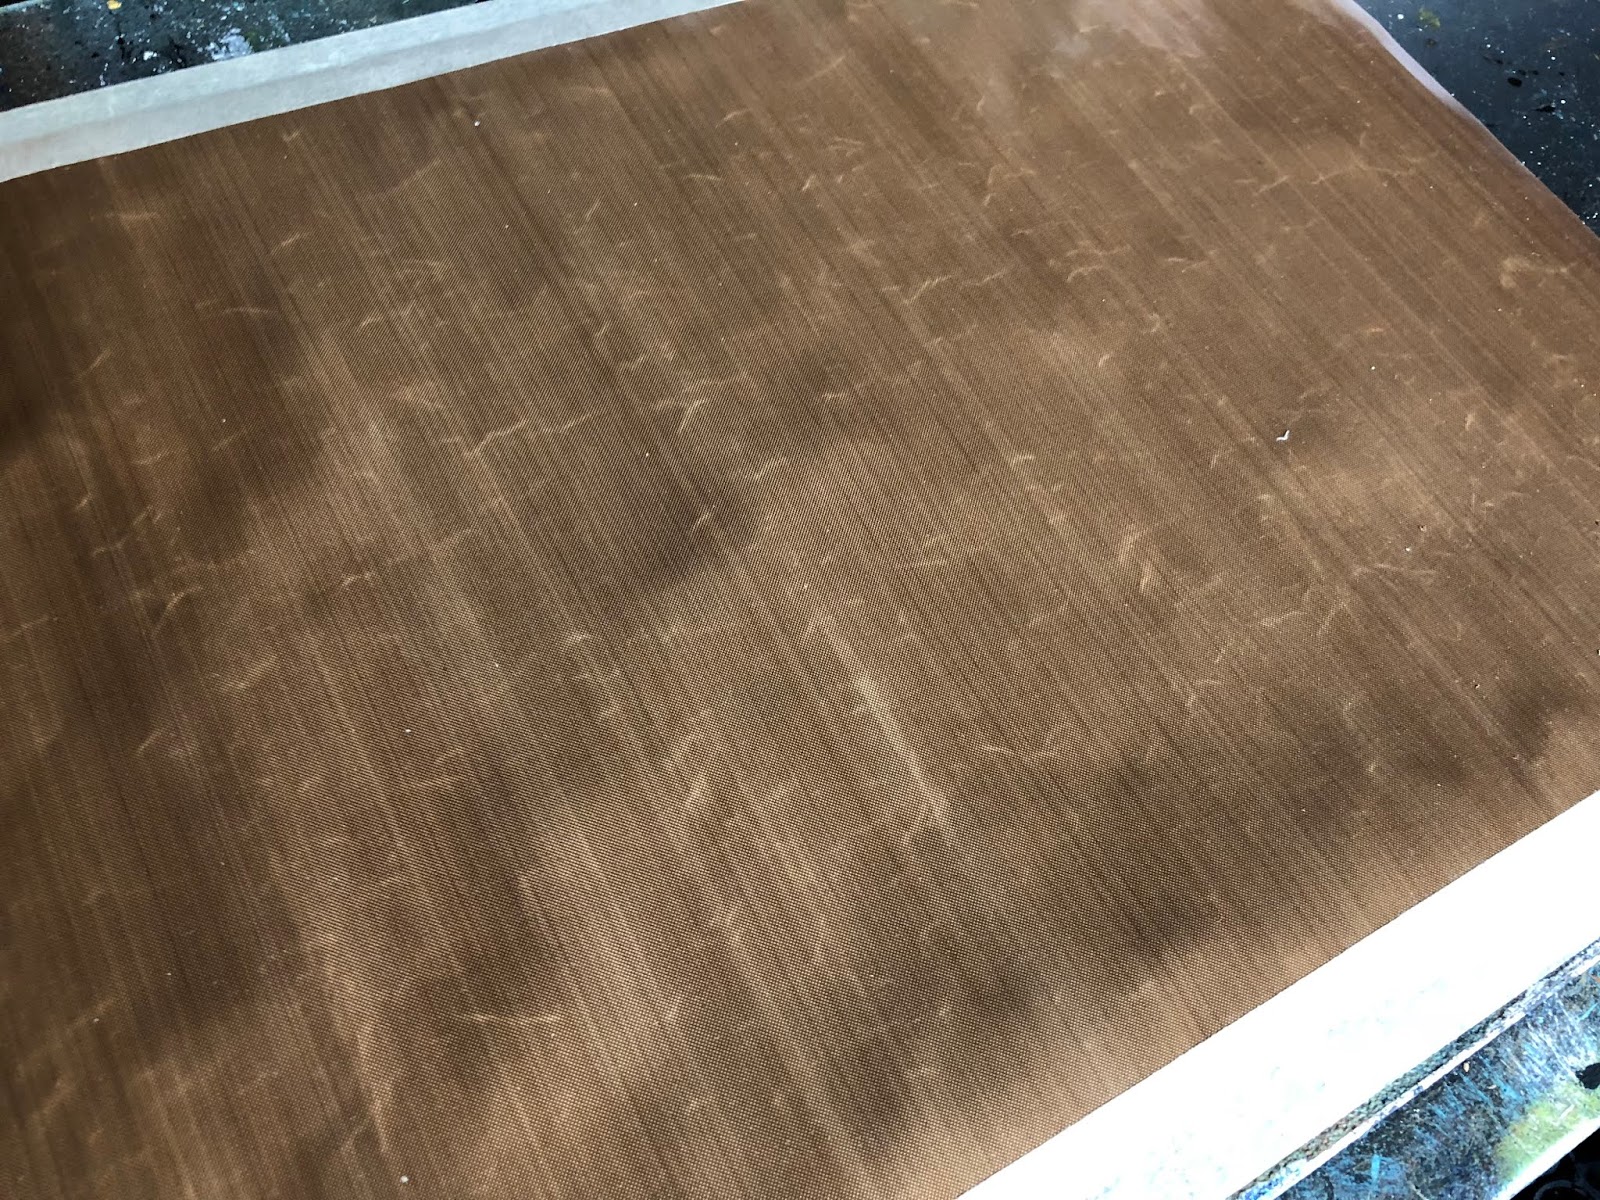
Swipe an embossing pad across a section of the pad in the size that you want your skin. If you are using this technique for layering, it works best with a translucent embossing powder. I chose Vintage Beeswax.


In order to get the skin fully made, repeat these steps two more times. So once cool, swipe the skin again with your embossing pad. Add more Vintage Beeswax and tap off the excess. Heat it and watch the magic happen. Doing this three times gives you a sturdy skin.

Peel off and voila. Notice that there are several holes and a bit of a feathering at the end. I think this makes the skin more natural but you can always add extra powder and melt again if you prefer a smoother surface.

I chose to print out a photo of a book page I recently made and sized it to match the dimensions of the skin.

Laying the skin over the piece adds dimension, texture, shadowing, depth and a bespoke, vintage touch.

I attached the skin to the paper using brads - and sandwiched thin beads in between for added interest. I also stamped the word Ethereal, from my new Impression Obsession Journal Jargon 5 stamp set, and slipped it under the skin for an extra detail. I adhered this to a slice of watercolor paper that was painted and embossed with my Patina Oxide Baked Texture.
Ethereal

(sold. thank you)


22 comments:
This is sooooooooooo beyond cool, as always!!!!!!! Rather than building your layers directly atop the page is this so you may insert the beads and other found materials between them? Oh my good golly, the possibilities...... thank you most masterful soul!!!!!!!!
Wow this looks amazing!
Such a fab technique that definitely adds so much more to your book page . Love the finished piece . Gonna have to give this a go for sure . Thanks for sharing Seth x
Seth your a true inspiration to me and look forward to more and more .
Great idea and art work. I'm wondering if you could stamp into the skin while it's still warm for more texture?
Ohhh this looks fab!!’ Way to go Seth!
Such a great technique Seth, it looks fabulous!
Mind blown!!!! So love this idea and will definitely have to try it out!! Thanks for sharing!!!
:O That is so fantastic!!!!
Oooh how fabulous!
Love
Amanda x
I love seeing this here today, mainly because I just love your art, but also in a selfish way because I accidentally ended up with a “layer” of vintage beeswax recently and thought, hmmmm but in my haste to attach it, I ended up cracking it into pieces (now mind you, those pieces were set aside for something else) but I would love some advice about how you poked the holes into it successfully. These layers add so much interest and I think that raising it up with the beads was such a fantastic idea.
This looks awesome. And way faster then then the resin sheets I would make.
What a great effect! Truly inspiring Seth, thank you!
brilliant - can't wait to try this.
Wow, Ilove that! I can't wait to try that technique!
51 WAYS TO LEAVE YOUR LAYER...
It's fun isn't it! I too accidentally made embossed skins Seth. I'm into beads so I sometimes add a little sprinkle for a different look.
Wow! This really does look amazing Seth. Love the vintage effect it gives to the underlayer and the textures are just stunning.
Thanks so much for sharing this fab technique.
Fliss x
Oh wow, this is such a creative technique! I love the effect it gives!
Brilliant effect, Seth! I really love it on your completed artwork. Thank you for sharing your great technique! Hugs!
Lush! I'll have to give this a go and maybe sprinkle in a bit of deep see in places, as it is a bit translucent as well, might look cool, worth an experiment I think :)
ohhhhhh, so cool!!!! That has some extra awesome sauce added! =D
Post a Comment